

Help center
Set up your business
This article covers creating your Bookledo account, naming your Organization and your first business, choosing a business type, and checking the chart of accounts that comes with it.
In Bookledo, an Organization holds one or more businesses. Each business keeps its own books, chart of accounts, and reports. The Organization sits above them, so you can see how all of your businesses are doing in one place and share them with the people you work with.
Create your account
- Go to the Bookledo sign up page.
- Enter your email address and a password of at least 6 characters. The rule is printed under the password box, so you do not have to guess it.
- Select Create account.
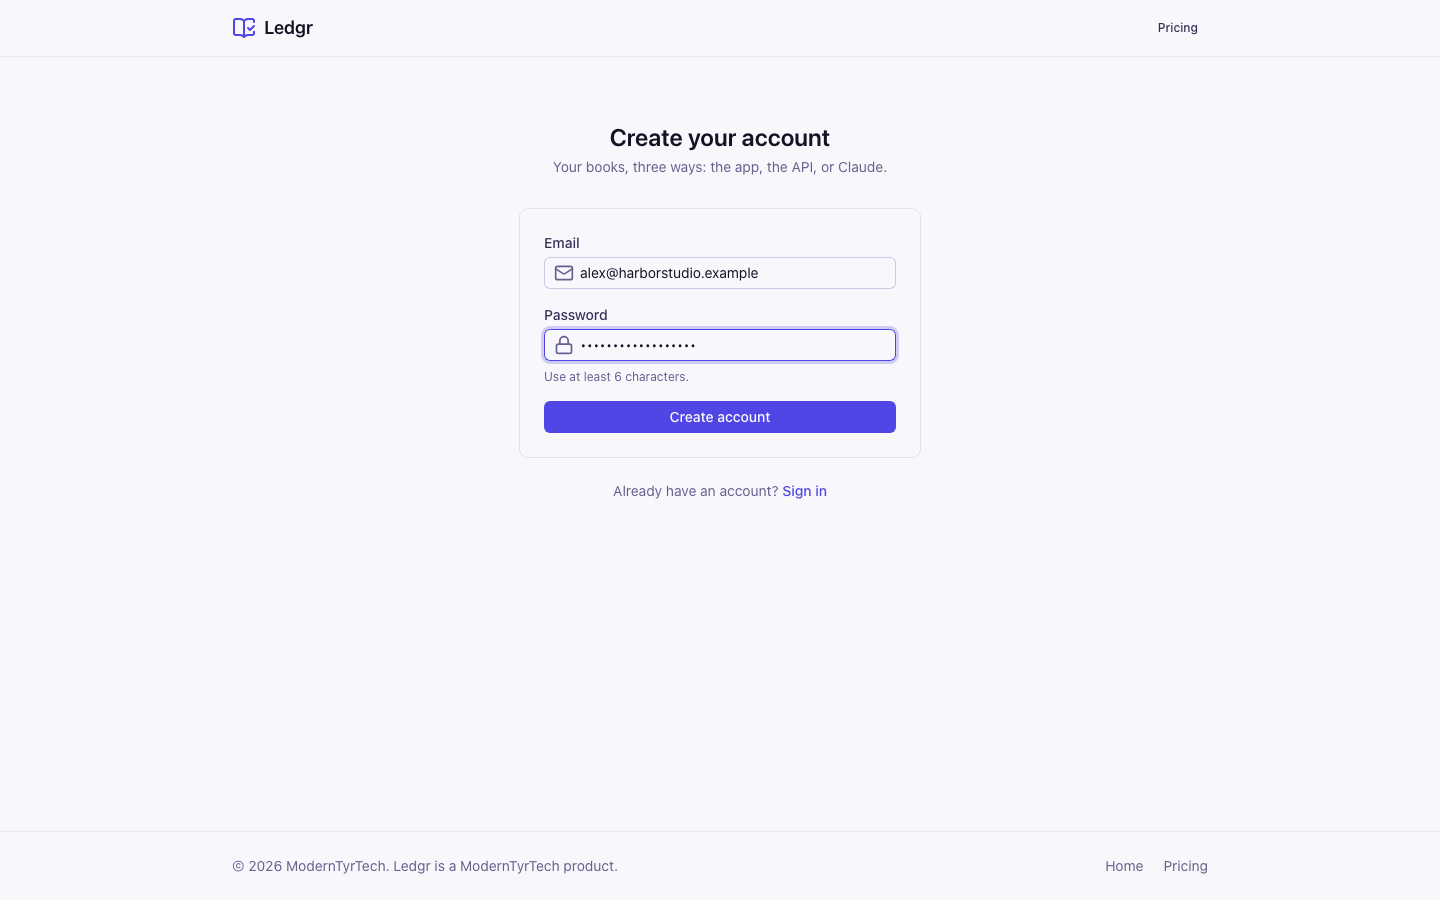
If Bookledo asks you to confirm your email address, open the message it sends and follow the link. Then sign in. If the message does not arrive, select Send the confirmation email again on the sign up page, or on the sign in page after a sign in that says your email is not confirmed. Sign in and reset your password covers that and what to do when you forget your password.
If someone already invited you to their Organization or business, sign up with the email address the invite went to. Bookledo gives you access as soon as you sign in, and you can skip the next section.
Name your business
Bookledo sets up your Organization and its first business from one form. The Organization is who owns and runs your businesses. Each business keeps its own books.
Every Organization and every business has two names.
- Legal Business Name is the name on your formation documents, such as "Harbor Lane Studio LLC". Reports, statements and invoices always use this name.
- Display Name is optional. It is a short name to help you recognize the business around Bookledo, such as "Harbor Studio". When you set one, Bookledo shows it in the sidebar, in menus and on lists. When you leave it blank, Bookledo shows the legal name there instead.
- On the "Let's set up your books" screen, type your Legal Business Name.
- Type a Display Name if you want a shorter one.
- Choose a Business type. Every business needs one. The choices are Sole proprietorship, Single-member LLC, Multi-member LLC, S corporation, C corporation, Partnership, Nonprofit, and Other.
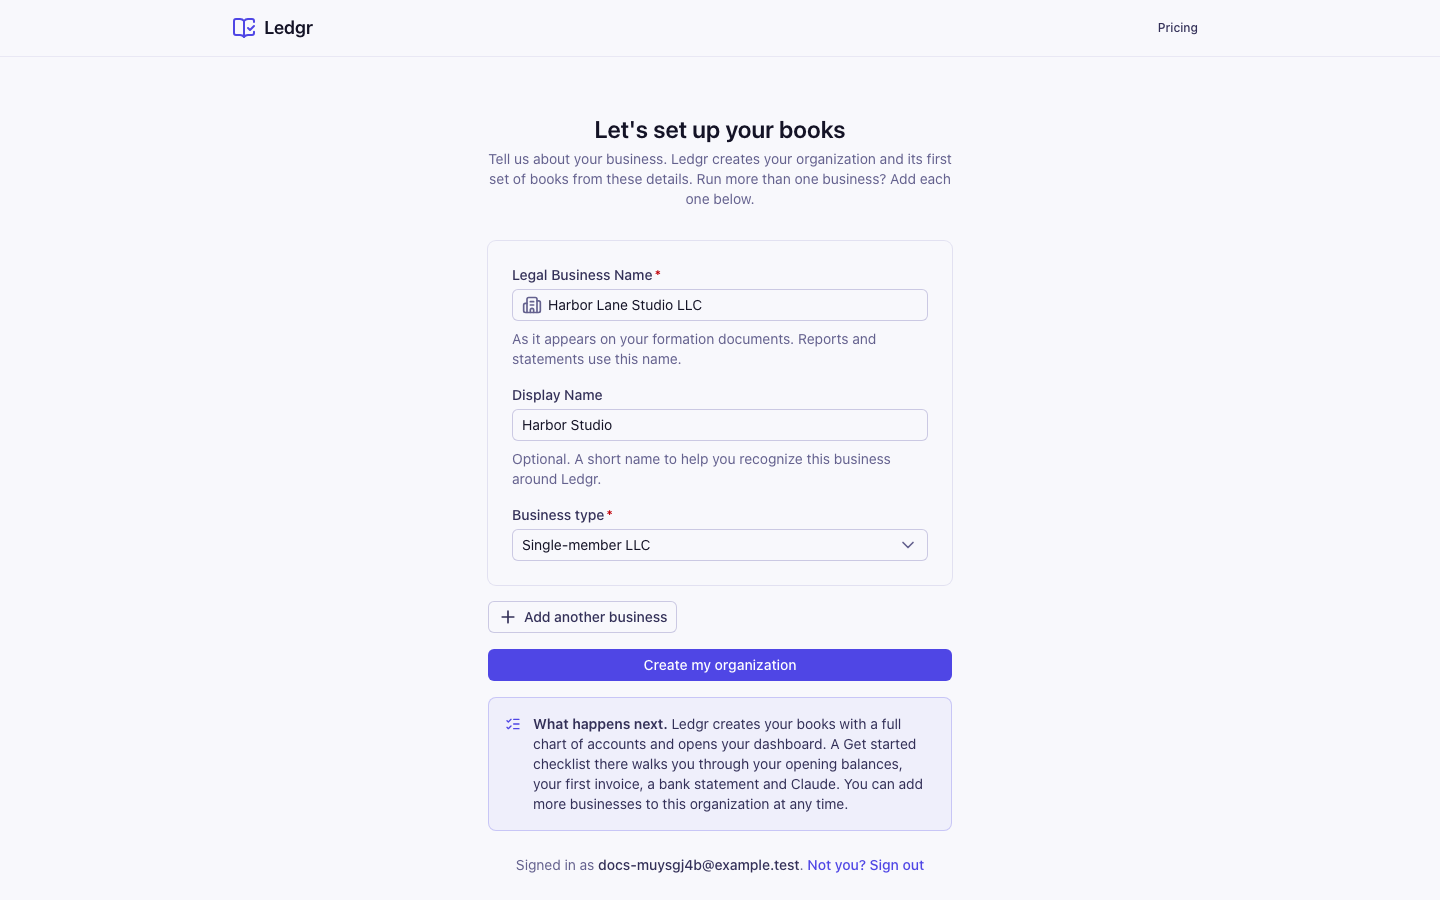
Your Organization and its first business both take these details. If you run a single business, that is all you need. Select Create my organization.
Under the form, What happens next tells you what Bookledo does with these details. Below it, Bookledo shows the email you are signed in with. If that is the wrong account, select Not you? Sign out.
Add more businesses
If you run more than one entity, add each one before you create your organization.
- Select Add another business. A new block appears for the next business.
- Enter its Legal Business Name, an optional Display Name, and its Business type.
- Repeat for each business. The Add another business button always sits under the last block.
- To drop a block, select the X at its top right.
- Select Create my organization.
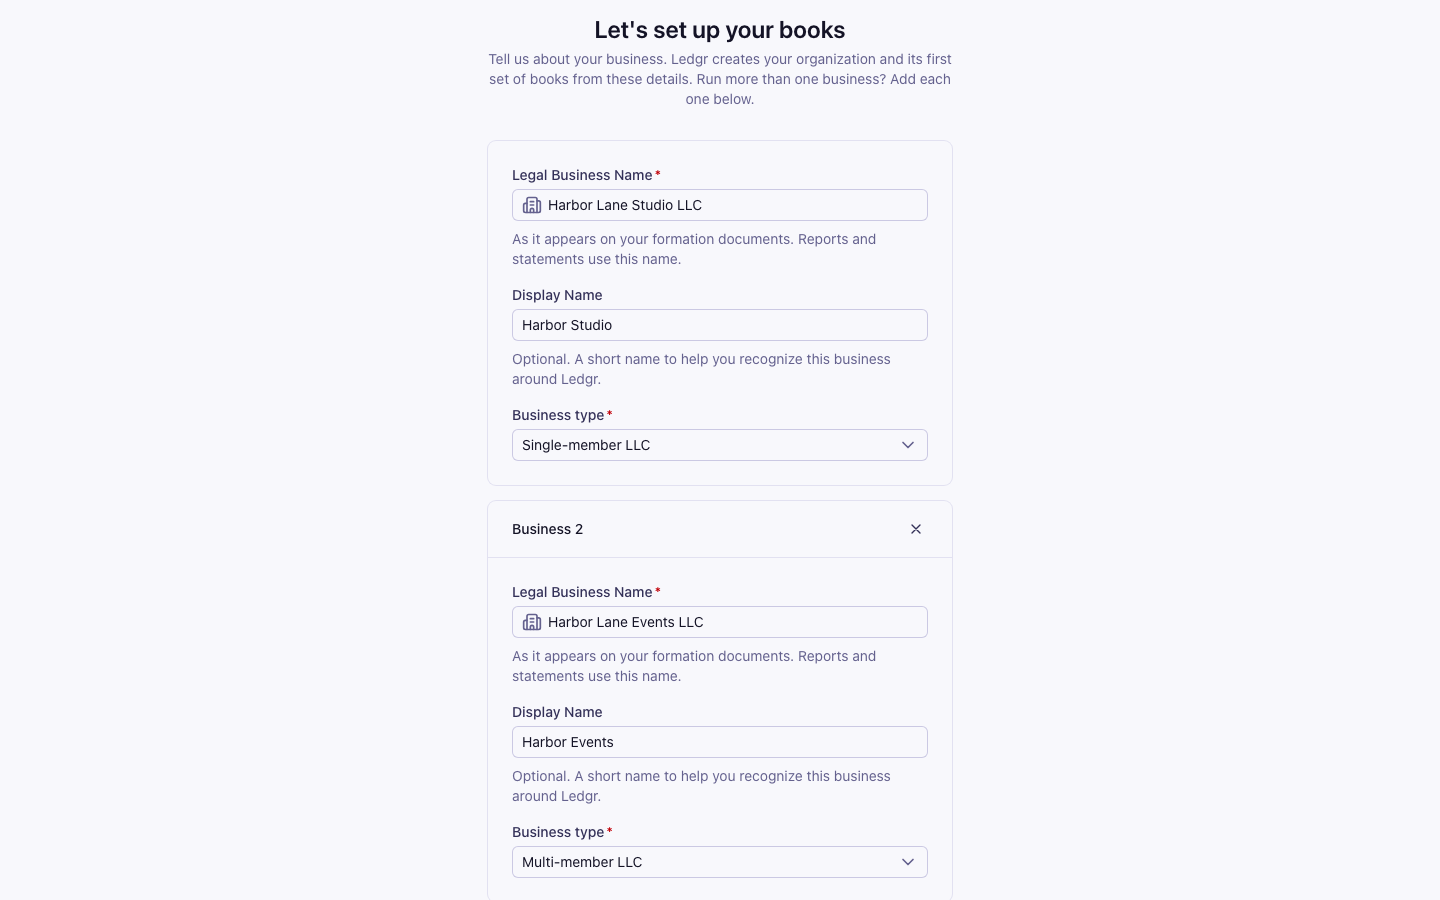
Bookledo creates every business at once. If one of them cannot be created, Bookledo creates none of them, marks the block with the problem, and says which business to fix. Fix it or remove that block, then select Create my organization again.
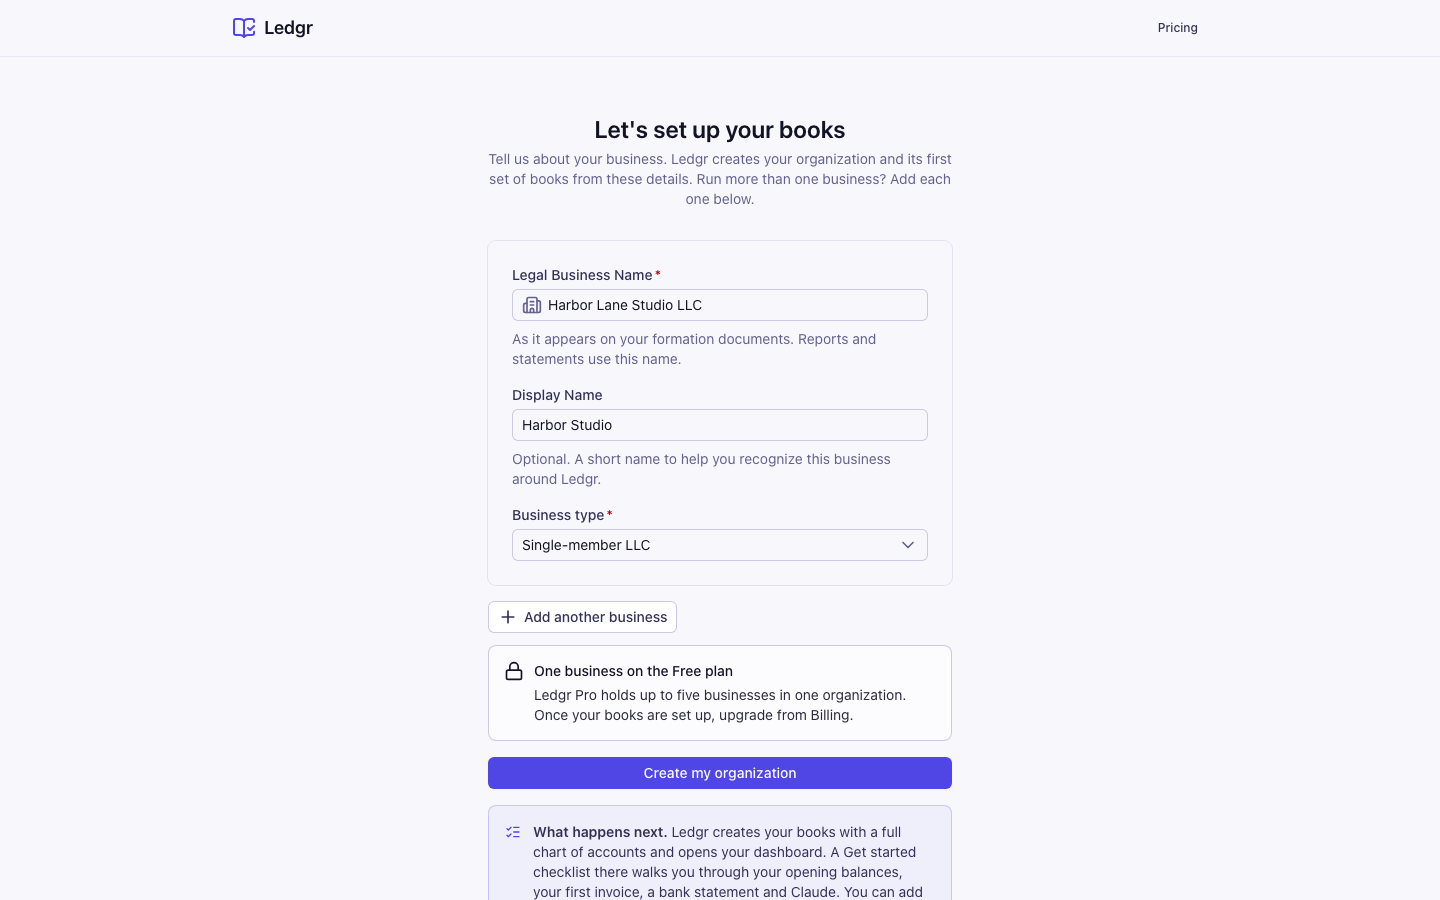
The Free plan covers one business in an Organization. On Free, Add another business shows a note about the limit instead of a new block. Once your books are set up, you can upgrade from the Billing page or when you add a business, and pay without leaving Bookledo. Upgrade to Pro explains how.
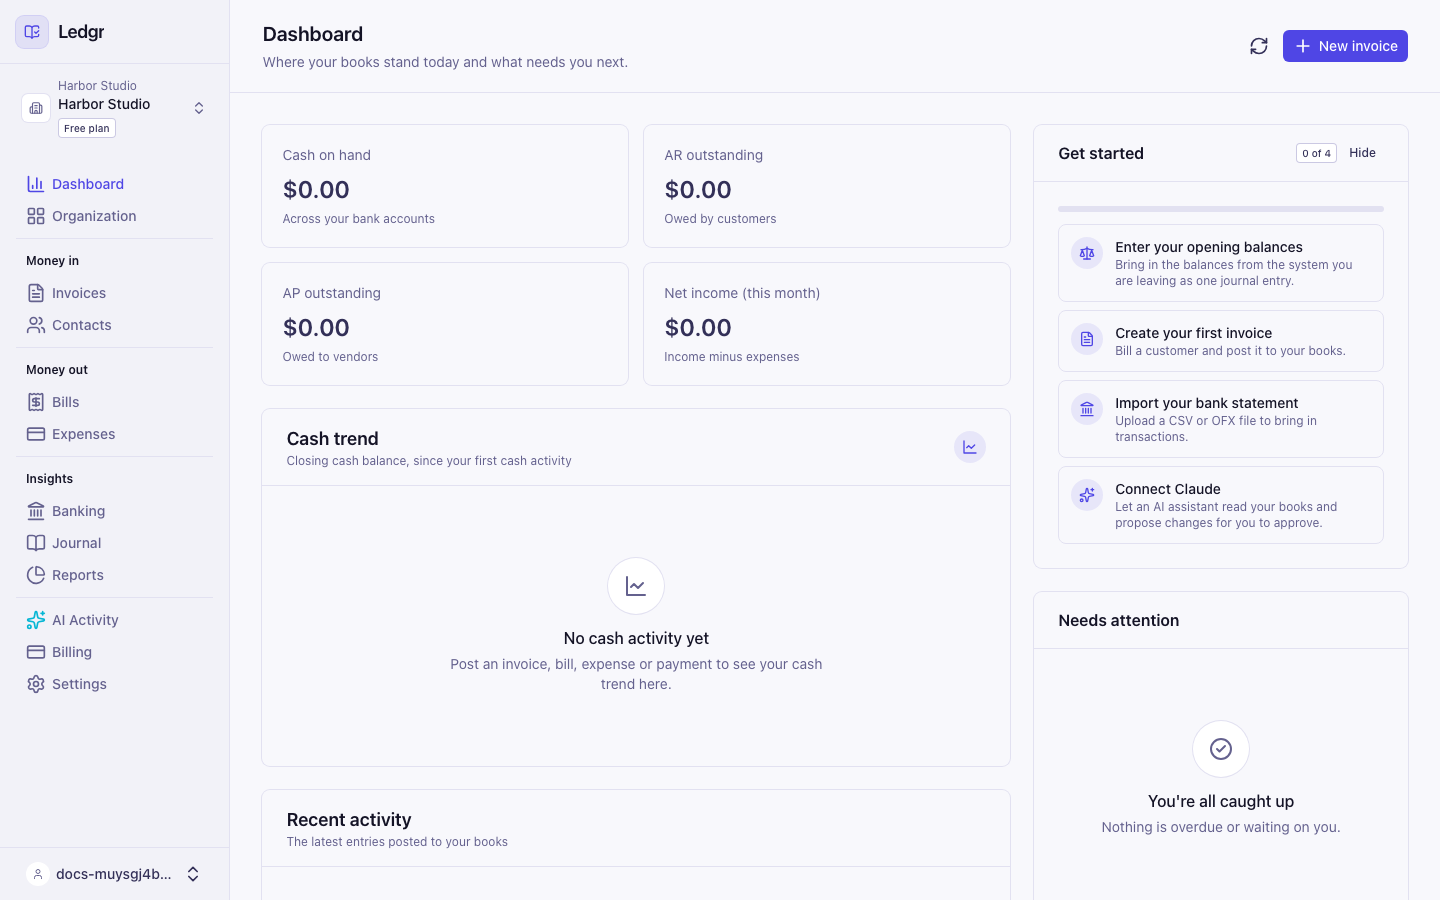
Bookledo opens the dashboard. The Get started checklist on the dashboard points you to your opening balances, your first invoice, your first bank statement import, and the Connect Claude setup.
Change a name or the business type
You need to be an owner or an admin to make these changes.
To change a business, follow these steps.
- Go to Settings and open the Business tab.
- Edit the Legal Business Name, the Display Name or the Business type. To remove the Display Name, clear the box.
- Select Save changes.
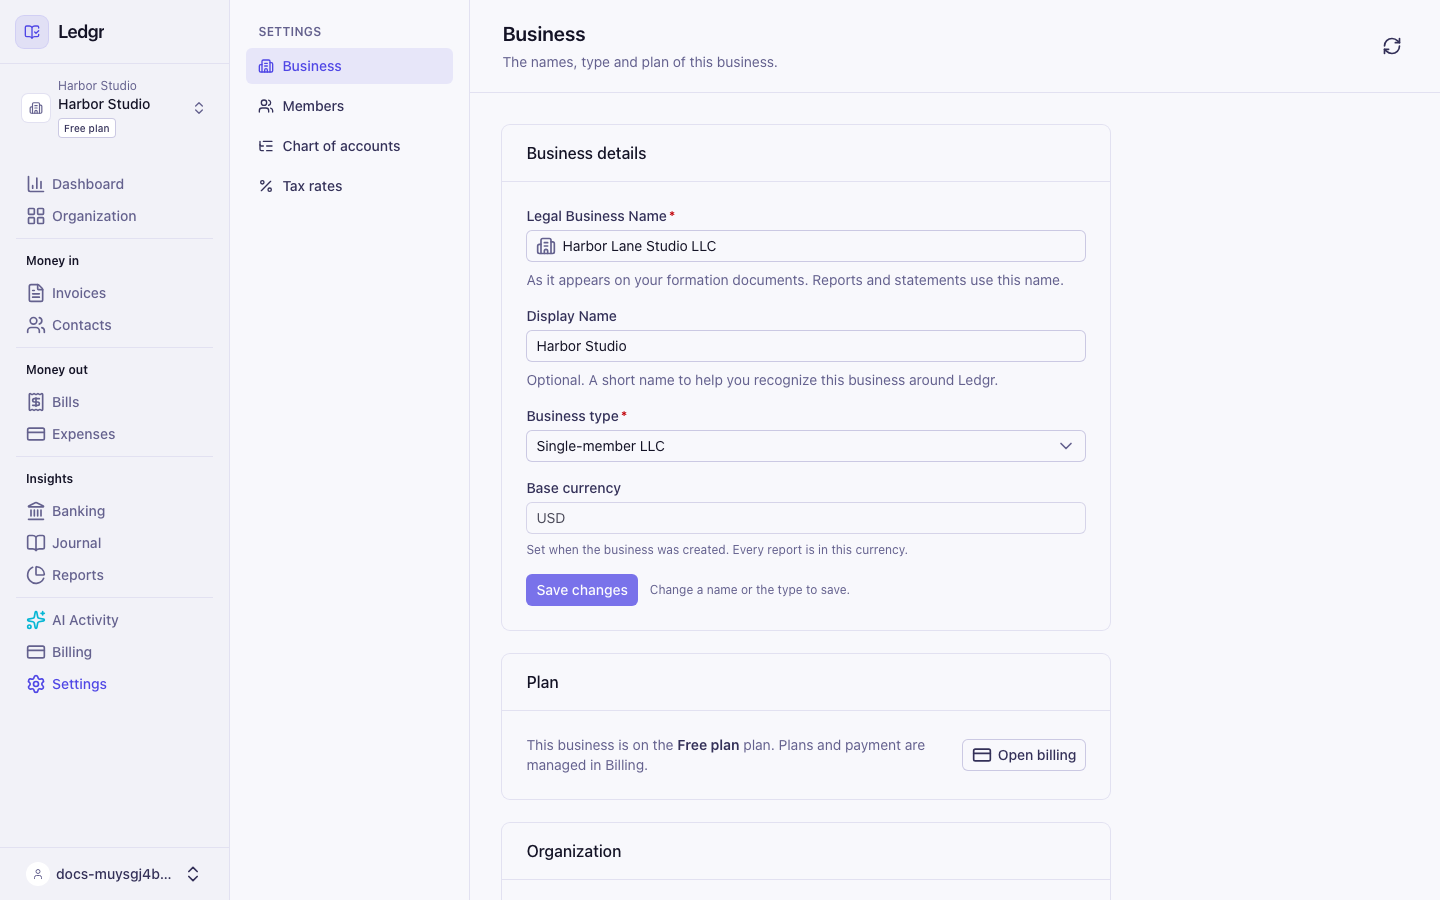
Currency is shown there but cannot be changed. Bookledo keeps books in US dollars.
If a business was created before the business type was required, the Business tab shows Choose a business type at the top. Pick the type that matches how the business is set up and save.
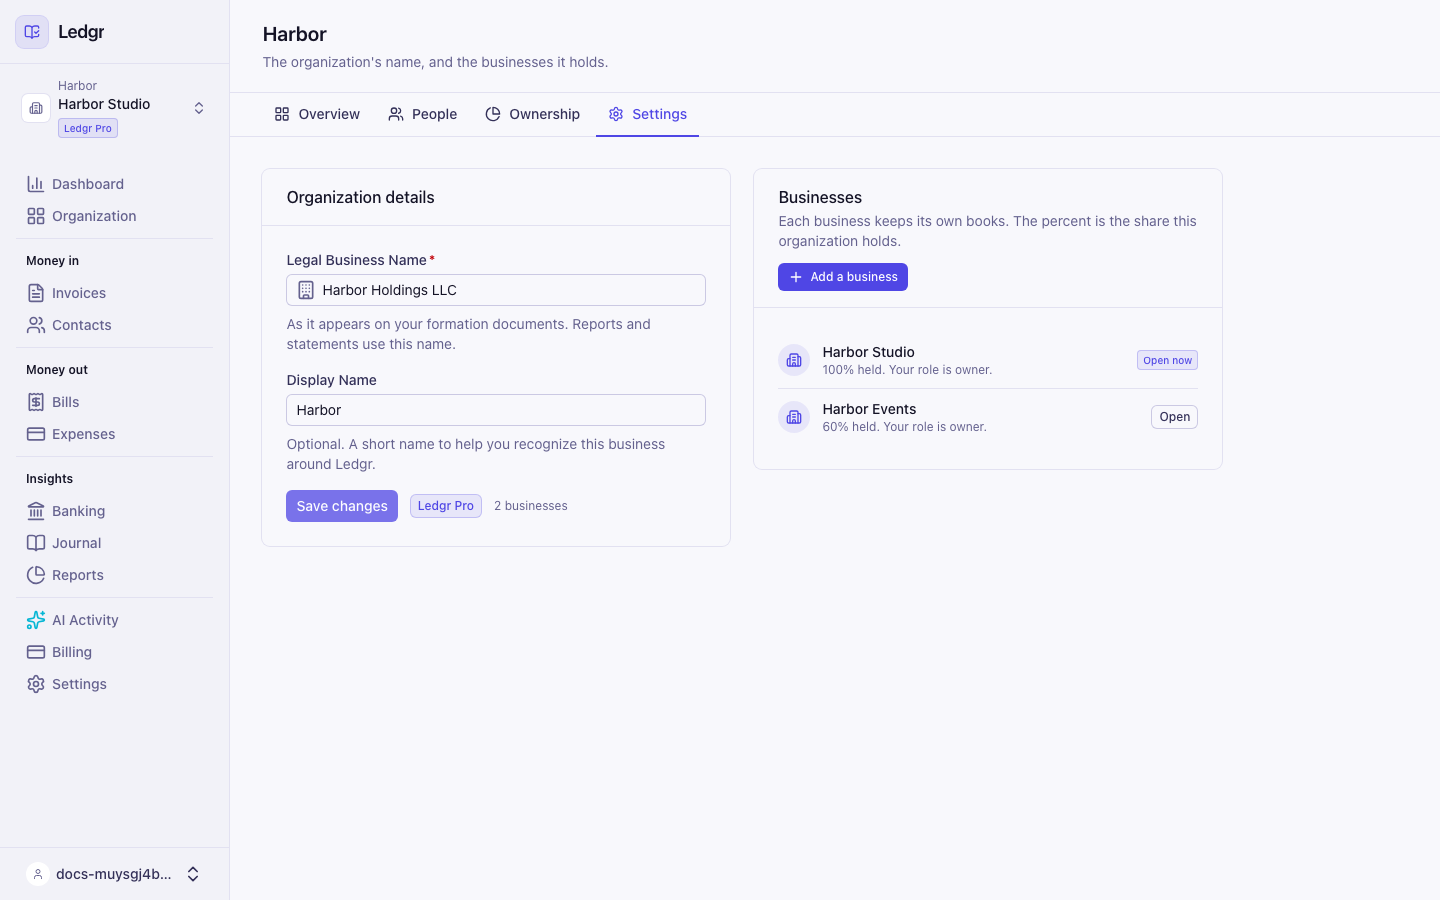
To change the Organization, select Organization in the sidebar, open the Settings tab, edit the Legal Business Name or Display Name under Organization details, and select Save changes. Manage your organization covers the rest of that page.
Check your chart of accounts
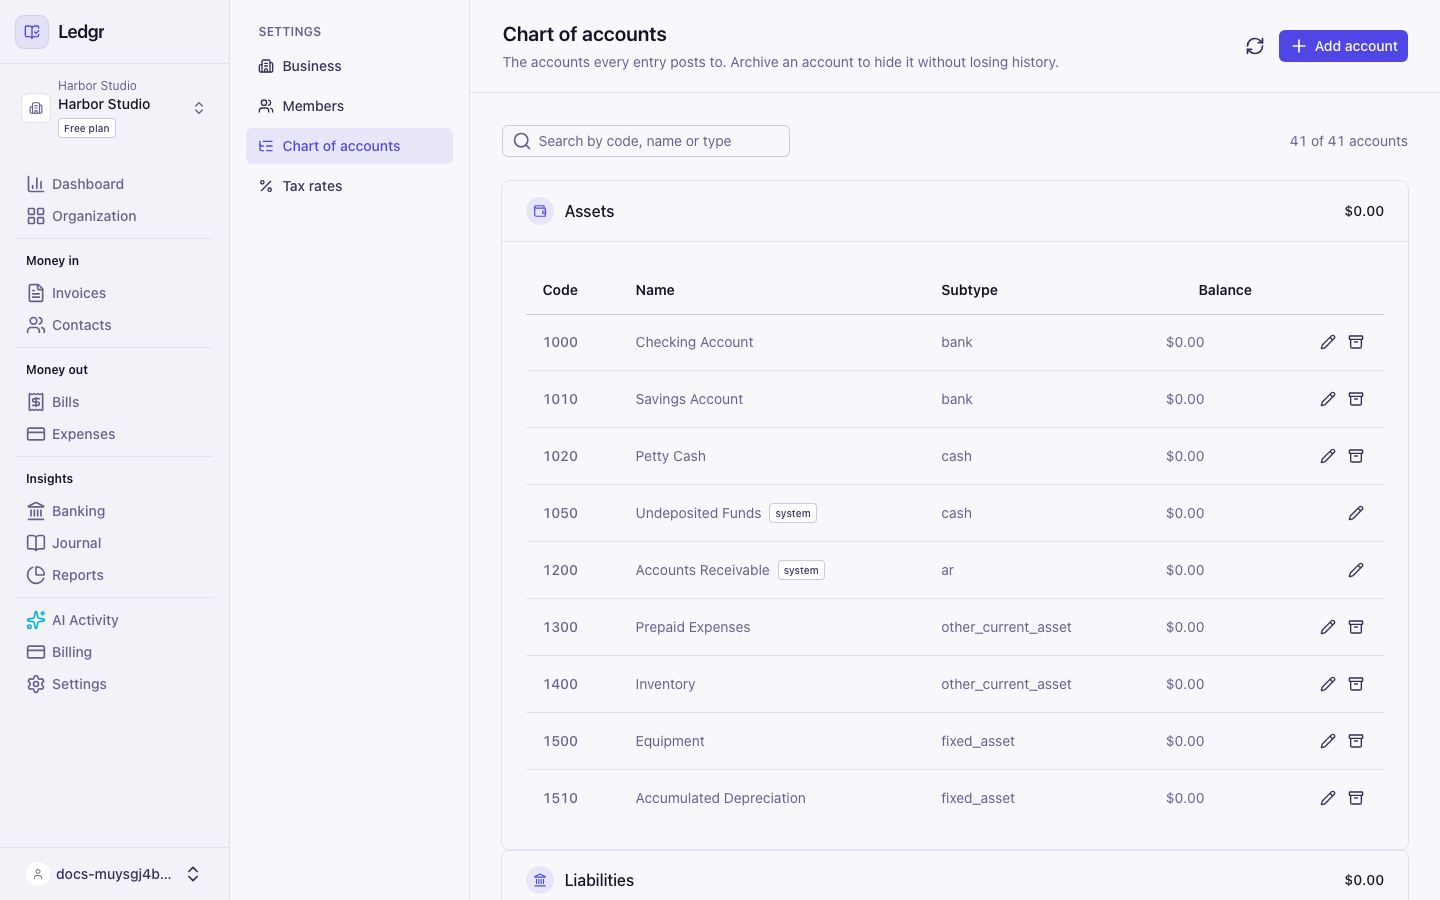
Your books start with a ready made chart of accounts. It includes a checking account, a savings account, accounts receivable, accounts payable, sales tax payable, owner's equity, retained earnings, income accounts, and common expense accounts such as Software, Office Supplies, and Travel.
- Select Settings in the sidebar.
- Open the Chart of accounts tab.
- Scroll through the groups. Each account shows its code, name, subtype, and current balance.
You can change the chart to fit your business.
- To add an account, select Add account. Enter a Code, pick a Type, enter a Name, and choose a Subtype. The subtype matters because reports and the Books page find bank, cash, card and tax accounts by subtype, not by code.
- To rename or edit an account, select the pencil icon on its row.
- To hide an account you no longer use, select the archive icon on its row. Archived accounts keep their history in your reports.
Accounts marked system are the ones Bookledo relies on, such as Accounts Receivable and Accounts Payable. You can edit them but cannot archive them.
If you bank with more than one account, add each one here with the subtype set to bank. Add a company card with the subtype set to credit card. Each one then appears at the top of the Books page with its own balance.
Add another business
A new business belongs to the Organization you are working in. It gets its own books, chart of accounts, and reports. The Free plan covers one business in an Organization. Pro includes five, and you can add more for $5 a month each.
- Select Organization in the sidebar, then select Add a business at the top right. You can also select the name at the top of the sidebar and choose Add a business, or open the Settings tab of the Organization and select Add a business in the Businesses card.
- In the Add a business window, enter the Legal Business Name, an optional Display Name, and pick a Business type. The type is required.
- If you can add businesses to more than one Organization, the window opened from the top of the sidebar also shows an Organization field. Pick the Organization that will own the new business. It starts on the Organization you are in. The window opened from the Organization page always adds to that Organization.
- Select Add business.
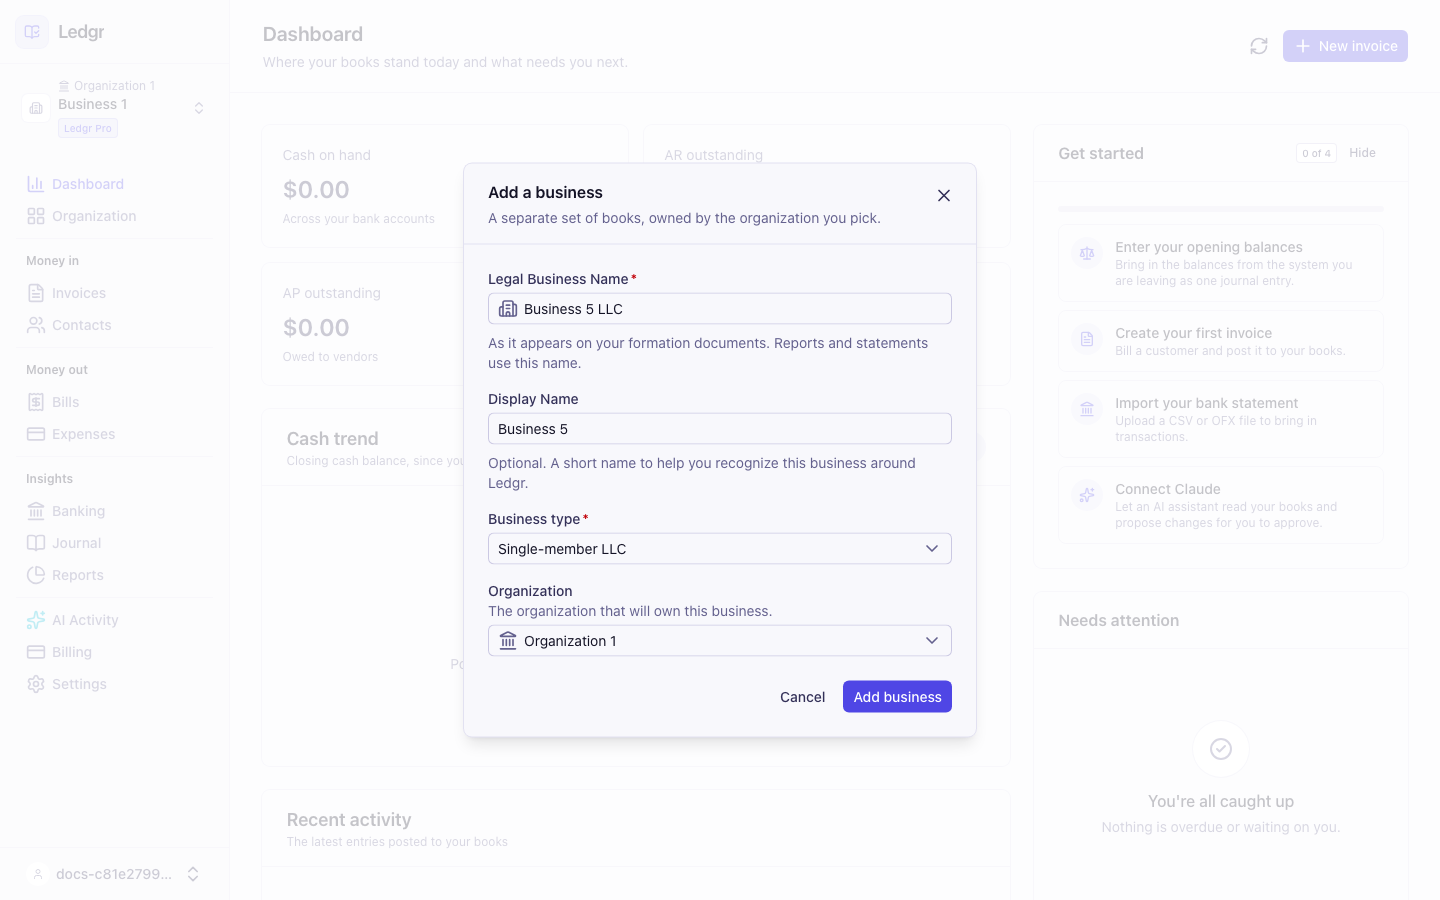
Bookledo creates the new books with a full chart of accounts and switches to them, inside the Organization you picked. You become the owner of the new business, and the Organization owns all of it until you record other owners. Own and share your businesses explains how to record a business that has more than one owner.
On the Free plan, selecting Add business for the Organization you are in opens the upgrade window over the form instead of creating the business. Choose Monthly or Yearly, pay in the window, and when the payment is confirmed you are back on the form with everything you typed still there. Select Add business again to finish. You never leave the page. Upgrade to Pro covers the payment.
If you picked a different Organization and it is on the Free plan, the window shows Business limit reached. Switch to that Organization first, then add the business there to upgrade in place.
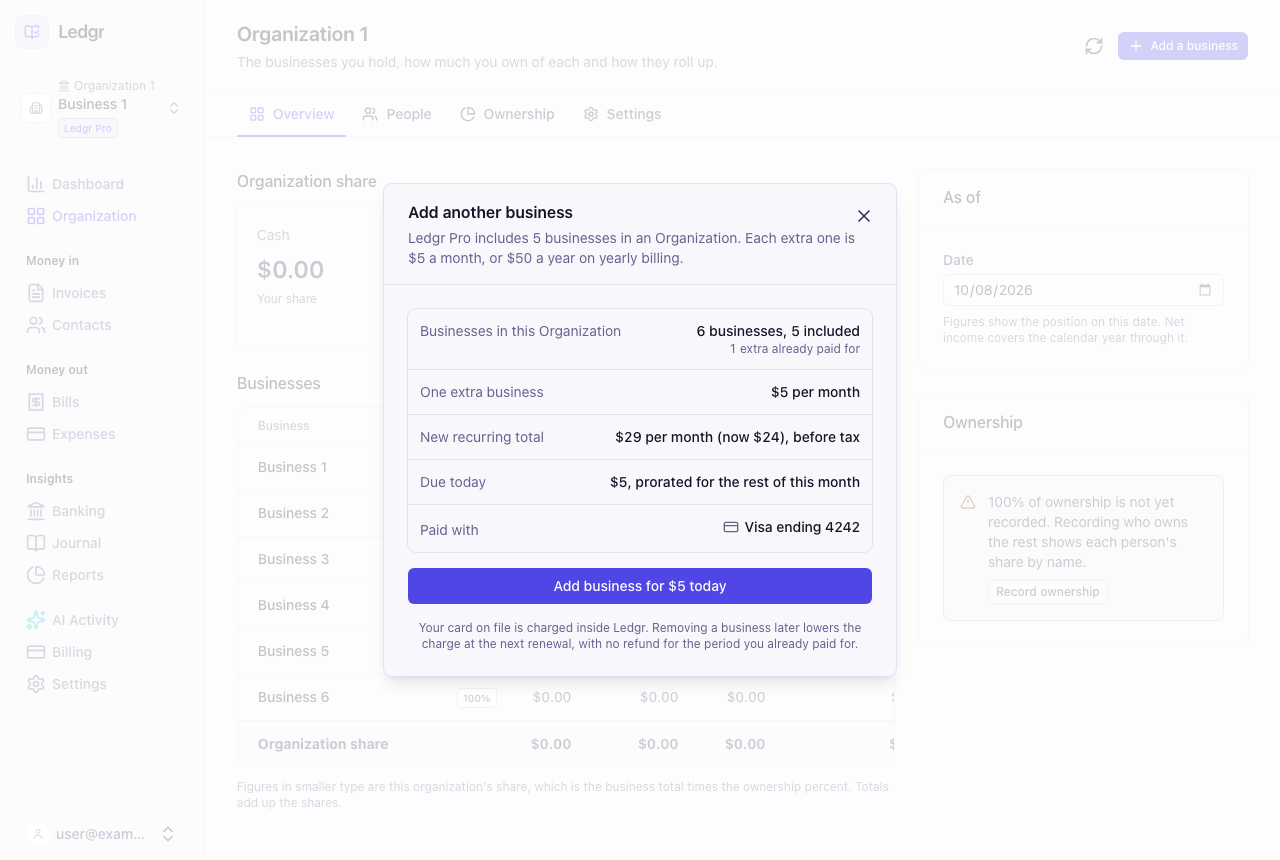
If a Pro Organization already holds the five businesses Pro includes, selecting Add business opens the Add another business window over the form. It shows how many businesses the Organization holds, the price of one more ($5 a month, or $50 a year on yearly billing), your new recurring total before tax with today's total in brackets, the prorated amount due today, and the card it will be charged to.
- Read the amounts. The new total is what you pay each period from now on. The amount due today covers the rest of the current period only.
- Select Add business for the amount shown. If your bank asks you to confirm the payment, the confirmation opens right on top of the window.
- When the payment goes through, a message says Business added to your plan and Bookledo creates the business with the name and type you already entered. You never leave the page.
Only an owner or an admin can pay for another business. Anyone else sees a message asking them to contact one. If the last payment failed, the window asks you to update the card on Billing first. If the subscription is set to end, it asks you to resume it on Billing. If your saved card is declined, the window says so and shows a secure card form. Enter another card there and pay, and the business is added the moment the payment succeeds. The card you enter becomes the default card for your future renewals. Nothing is charged until a payment succeeds. You can select Back to leave the form, and if you close the window and try again, it opens right back on the same payment so you can finish it. If a payment is waiting and cannot be finished yet, the window says it will clear on its own within a day and offers Check again.
Removing a business lowers the number of extra businesses you are billed for, starting with the next renewal. Its place is paid for until then, so you can add a business in its place before the renewal at no charge. Bookledo does not refund the period you already paid for.
Switch between businesses
The top of the sidebar shows the Organization you are in and the business you are working in, each by its Display Name when it has one.
- Select the name at the top of the sidebar.
- The menu lists each Organization you belong to, with its businesses under it. An Organization row has a landmark icon and an Organization tag, and you cannot select it. Its businesses sit indented below it with a building icon. A check mark shows the business you are in. A business the Organization owns only part of shows its ownership percent beside its name.
- Select a business to open its books.
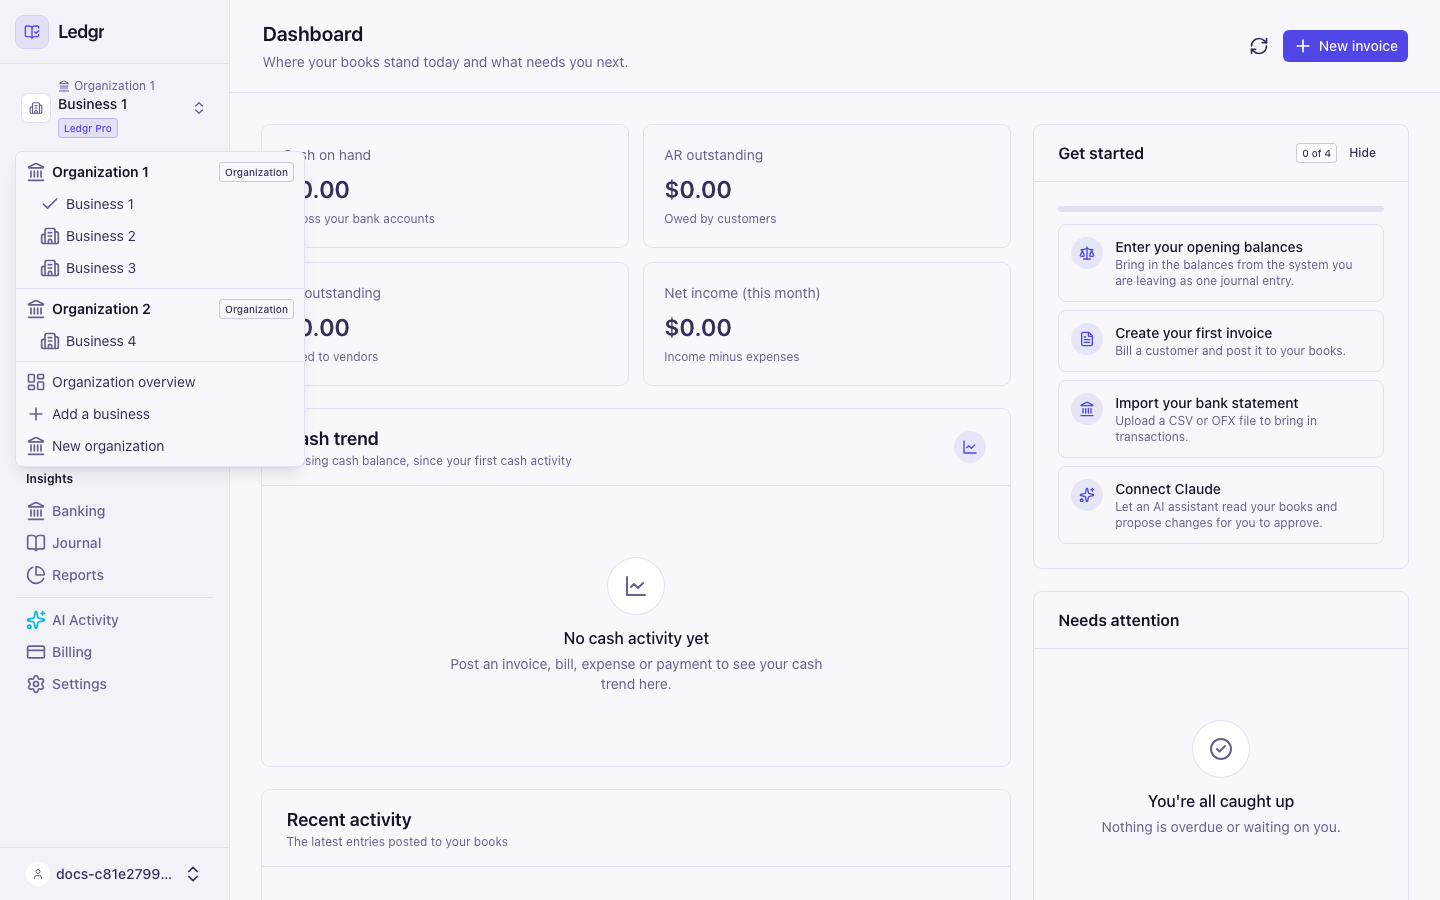
Bookledo reloads and remembers your choice the next time you sign in.
Start a separate Organization
Most people need only one Organization. Start a second one when a set of businesses has different owners or a different plan, such as a venture you run with a partner.
- Select the name at the top of the sidebar.
- Select New organization.
- The New organization window asks the same questions as setup. Enter the Legal Business Name, an optional Display Name, and the Business type. The new Organization and its first business both take these details.
- To add more businesses to the new Organization, select Add another business for each one.
- Select Create organization.
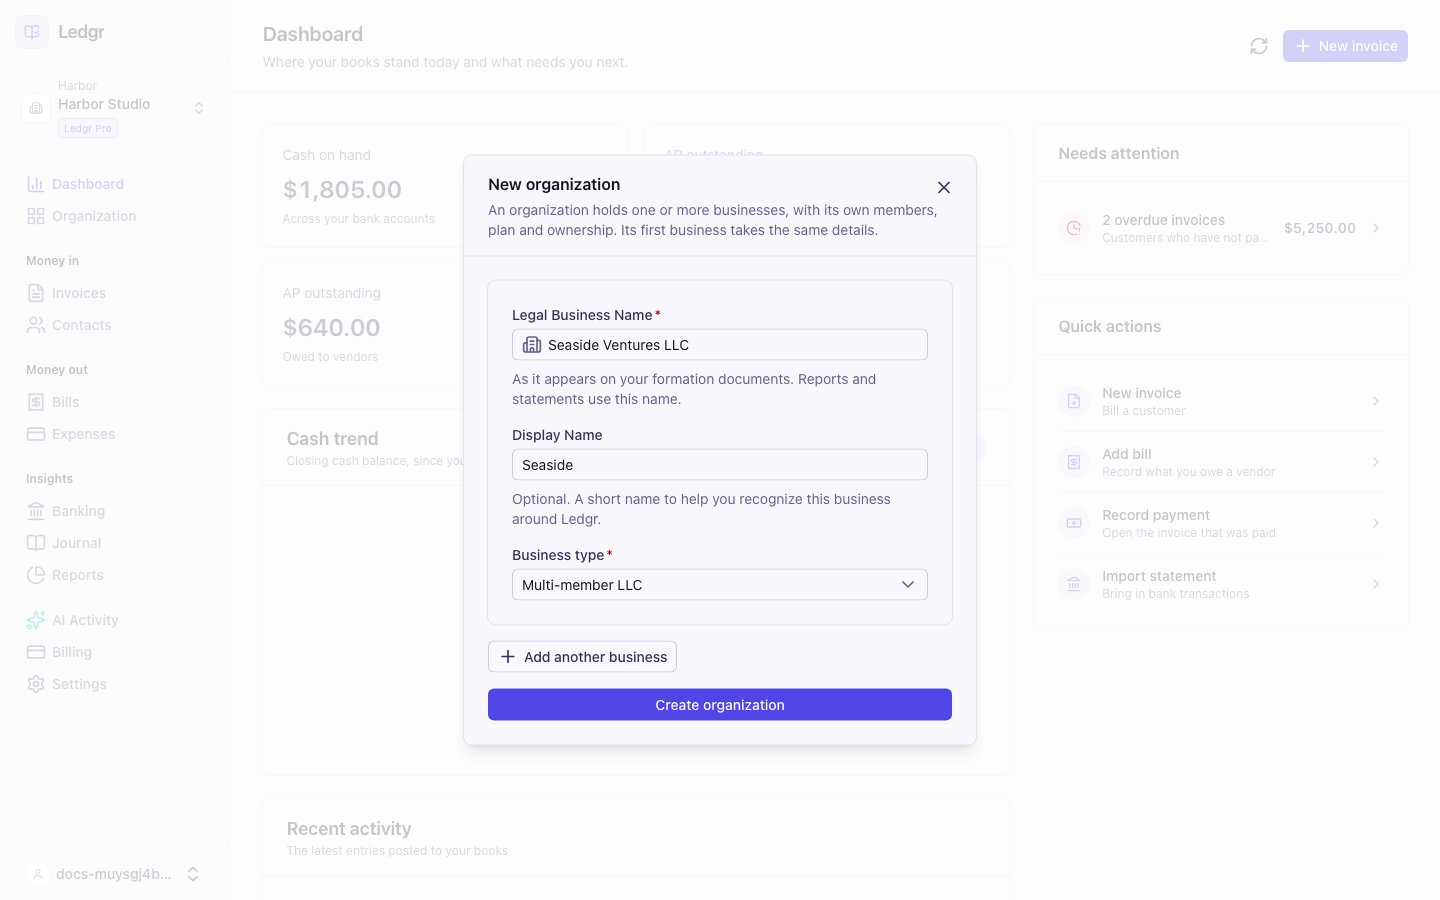
Each Organization has its own plan, its own members, and its own businesses. The Free plan covers one Organization that you own. Pro covers up to five.
If you are on the Free plan, selecting Create organization opens the upgrade window over the form. Pay in the window and Bookledo creates the new Organization by itself as soon as the payment is confirmed. You do not need to select anything again, and you never leave the page. If you already own as many Organizations as Pro covers, the window says so and creates nothing.
See all of your businesses at once
The Organization overview shows the balances of every business in your Organization without switching between them.
- Select Organization in the sidebar. You can also select the name at the top of the sidebar and choose Organization overview.
- Pick a date in the As of box on the right. The figures show the position on that date.
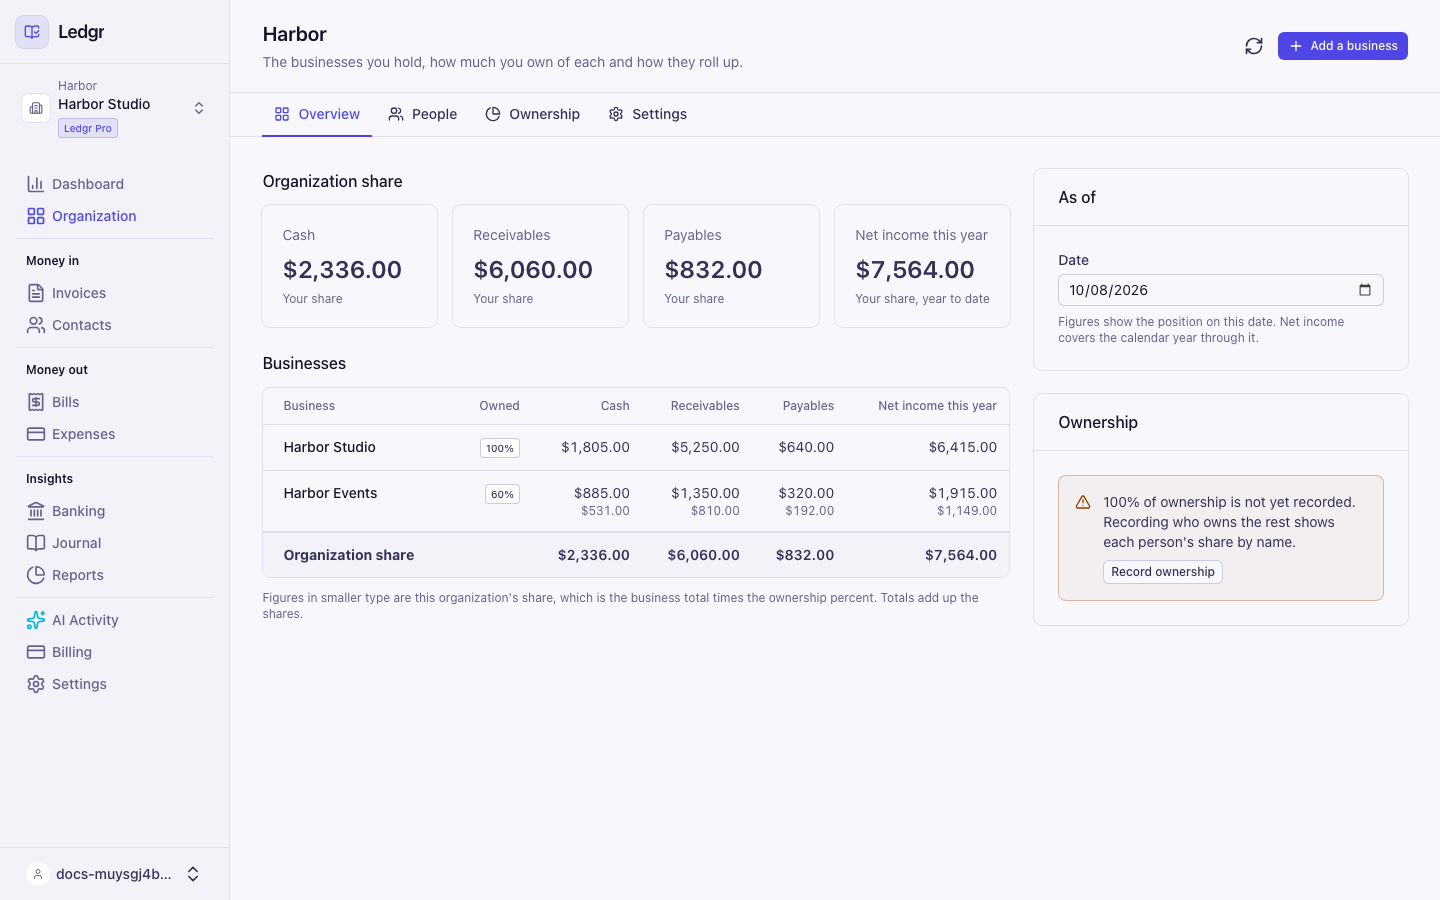
The page title is the Organization's name. When the Organization and its only business share a name, which is how every new account starts, the title reads Organization so the same name does not appear four times.
With one business, the overview shows it as a card with four figures. With several businesses, the Organization share tiles add up your share of all of them. The table under the tiles shows each business, how much of it the Organization owns under Owned, and its Cash, Receivables, Payables, and Net income this year. For a business the Organization owns only part of, the Organization's share appears in smaller type under each figure. A business owned 60 percent adds 60 percent of its numbers. Select a business name to open its books.
If a figure cannot be loaded, the page says so with a Retry button instead of showing zeros.
The Ownership card on the right shows how much of the Organization itself has no recorded owner, such as 100% of ownership is not yet recorded. It measures who owns the Organization, not who owns each business, so it reads 100% until you record the people who own the Organization. Select Record ownership to open the Ownership tab and record them under Organization ownership. Once every owner is recorded, the card reads All ownership is recorded.
If a notice reads Some businesses are not in these totals, it names each business that was left out and why. Usually you do not have access to its books. Ask an owner of that business to invite you.
For full statements across your businesses, open the consolidated reports. Run your reports explains how they work. To record who owns each business and invite other people, read Own and share your businesses. Manage your organization covers every tab of the Organization page.
Fiscal year
Bookledo does not have a fiscal year setting. Reports use the dates you pick. The YTD button on dated reports starts on January 1. If your fiscal year starts on a different date, choose the start and end dates yourself with the date boxes at the top of each report.
Next steps
- Enter your opening balances if you are moving from another accounting tool.
- Import bank transactions to bring in your statements.
- Own and share your businesses to record owners and invite your team.
- Manage your organization for the Organization page, tab by tab.